Mindomo 101
This tutorial is using a free account which prevents me from using all of the features this program has to offer. Instead there will be detailed descriptions of all the features this program has to offer.
Review
Cons
1. Difficult to select and drag topics around and hard to insert a new topic because sometimes it goes on top of other topics that are there and it is hard to grab them to move it into a free spot.
2. Need to have the premium version because you can only access certain features using the free version
3. Task feature is hard to use but it could be because I don't have access to the premium version so it might not be working properly
Pros
1. Can search within your own mindmap
2. Can create multiple connections and show relationships between topics
3. Can create many different designs and display information in different graphical formats
4. Can share the products with the public or have privacy settings
5. Can work individually or in small groups
6. Can insert a variety of multimedia into the map
7. Can convert the mind map into a presentation
8. Easy to follow instructions and help features (they are also easy to contact)
9. Many different uses for this program because of the variety of organizers and ability for presentation mode.
Accessibility and Useage
This program is user friendly and would be great to use for all grade levels and subjects.
Access
Can be used with other programs like evernote or google drive
Windows and Apple
Students can access this at home or school
Menu help can be switched into various languages
Many design options and ability to change font type and size
Has ability to record sound
On the tool bar on the left hand side of the screen there is an icon that looks like a picture of mountains with a moon.
At the bottom of this screen there is an option with an icon that looks like a microphone to record a voice clip and insert this into the mindmap.
Easy to share products with others
Physical Design
Layout
The layout of screen follows the same as most programs with the tools on the far left side of the screen, zoom at the bottom right, and the menu at the top left, and the space in the middle for the graphic organizer.
All the buttons and icons on the screen are large and connect to what their function is. For example the icon for making comments looks like a speech bubble.
Curriculum
I am currently teaching Biology at the grade 9 and 10 level, but English is my second teachable and so I also had a look at the Ontario Curriculum.
Science: Biology
GI SCHOOL
Currently I am redoing the Biology curriculum for grade 9 and 10 at my school and we are adding a section about science literacy which will contain benchmarks about research and technology. This program would be great for students to connect the skills of media literacy, comparing/contrasting, researching, decision making, creating graphic organizers etc... together within the context of biology.
ONTARIO
Looking at the Science and Technology curriculum in Ontario for grade 1-8 and 9-12 there is a skill set required for scientific inquiry and technological problem solving. All of the skills students should be practicing and demonstrating are in the areas of scientific inquiry, research skills, and technological problem-solving skills, initiating and planning, performing and recording, analyzing and interpreting, and communicating . There is also reference to students being able to work in small groups which this program would allow the students to be co-operative learners. This program would allow students to learn how to do many of these skills at the same time.
English
ONTARIO
Looking at the secondary curriculum for English there is a focus of encouraging and using ICT to help students collect, organize, sort through data that they could then present about. Also there is an expectation that students can use technology for a presentation.
Grade Level
Friendly for all elementary and secondary students
Subjects
All subject areas
Products
General ideas for how this program could be used for various activities and evaluations in the classroom.
Group
Have students create a product together and learn how to delegate using the task feature. Have them share their products with you, other students, or the public.
Individual
Have students create their own products based on certain success criteria and share it with you, other students, or the public.
Presentation
Use the presenter feature in the top right hand corner of the screen to turn mindmaps into a presentation (Looks like a presentation screen).
Have students explore a topic and present their findings into presentation form.
Research and Planning
Have students organize their ideas by using this program before they write a lab, paper, or do an analysis of a topic.
Have students plan and comment on each others mindmaps to see how they could organize ideas better or make sure they have all the necessary requirements for their larger product (revising).
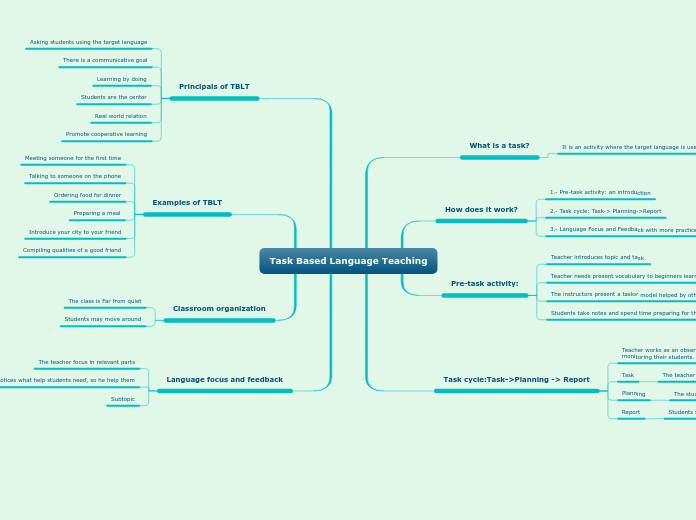
Mindmap
Have students create different graphic organizers using templates or by creating their own design.
Have students continuously work on a mindmap throughout a unit to build upon their knowledge and send it in to you at checkpoints for feedback (use comment feature).
Have students use mindmaps to summarize information and draw connection/relationships with material presented in class.
Have students create a lab report by creating a mindmap instead of a paper.
Features
Internal Features
Editing
Sharing
On the top right of the screen there is an icon that says Share and has a picture of a mini mindmap.
By clicking here you are able to send this by email, get the link by making it public, and customize the editing options.
Icons
On the tool bar on the left hand side of the screen there is an icon that looks like a smiley face.
By clicking on a top you can insert an emoticon within a topic box.
Tasks
On the tool bar on the left hand side of the screen there is an icon that looks like a checklist.
This feature is to create lists and be more organized. You can set the date for completion, assign a priority to it, describe it in a note, and write who is managing this task.
Notes
On the tool bar on the left hand side of the screen there is an icon that looks like a piece of lined paper.
By clicking on a topic that you have placed on the mind map and then this icon you can insert a note that expands on the topic you have placed in the map. After you place a note it will appear as an icon beside the topic with three lines. By clicking on it the note will open!
Comments
On the tool bar on the left hand side of the screen there is an icon that looks like a speech bubble.
By using this feature you can like or dislike something on the mindmap and leave behind a comment. This would also be good for providing feedback or having other students comment on things.
External Features
Videos
On the tool bar on the left hand side of the screen there is an icon that looks like a picture of mountains with a moon.
By clicking here there are several options for uploading videos either from a file, from google search, youtube, or vimeo.
Pictures and Clip Art
On the tool bar on the left hand side of the screen there is an icon that looks like a picture of mountains with a moon.
By clicking here there are several options for uploading pictures either from a file, from google search, or clipart.
Hyperlinks
On the tool bar on the left hand side of the screen there is an icon that looks like two links put together.
Within this option you can insert a web link, upload a file, create a link to another topic within your mindmap, or insert a link to another map you have created.
You can also drag and drop files!
Help and Tips
Live Support
You can real time chat with someone to help you create your product.
Menu Help
The menu icon is located on the top left hand side of the screen. The icon is three horizontal lines.
The help screen will open in a new screen and has all the program features listed on the left hand side for you to browse. You can also search within the help screen for the topic you need help with.
Shortcuts
The menu icon is located on the top left hand side of the screen. The icon is three horizontal lines.
The shortcuts screen shows all the keystrokes that you can use easily instead of using the mouse and clicking.
YouTube Tutorials
On the left hand side at the bottom of the tool bar is an icon that is a circle with a question mark. By clicking on this you will be linked to short videos that will help you with any question or problem you have.
If you have a very specific word to match your problem then the video will be suggested .
All videos will be opened in a new screen.
