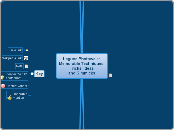
Laguna Photowalk:Memorable Techniques,Tricks, Ideasand Gimmicks
I tried to organize things I learned, or was reminded of, when the 39 participants of the Scott Kelby's Worldiwde Photowalk in Laguna Beach submitted their best shots to the group pool and discussed each other's work.
Special thanks to Alan Sisto for organizing and leading the photowalk as well for judging the contest entries and providing insightful feedback on most photos.
Please send your feedback on this chart to photo@tolkachev.com
Post-processing
Strong Title
Framing
Collage
Syntheticimage
Oversharpening
Contrast
Increased Contrast
Reduced Contrast
Color
Cross processing(digital)
Traditionally, the procedure of deliberately processing photographic film in a chemical solution intended for a different type of film.
Nowadays, mostly doen with plugins for Photoshop.
Gradient Filter
Added Color
Saturation
B&W Conversion
Desaturation
Selective Desaturation
Oversaturation
Vignette
Cropping
Creative
Panoramic
Square
Tight
Composition
While composition can be improved in post-processing through cropping, it is always best to compose the shot in-camera. Not all composition slip-ups can be fixed in post, and at any rate it is always easier to do it in-camera.
Breaking the Rules
Filling the frame
Dramatic crop
Color Spot
Lines
Horizontalsin a vertical crop
Curves
Diagonals
Perspective
Natural Framing
Intimacy withthe Subject
Subject Isolation
Subject Separation
Key
Honorablemention
Contest winner
Idea for the nextphotoshoot
Note
The notes can be excerpts from Wikipedia, comments from flickr or the mindmap author's idle musings
Wikipedia link
Flickr link
Interesting Subjectsand Elements
Aside for the traditionally pleasing subjets, such as dogs, kids and sunsets, many shots
Being at the rightplace at theright time
Capturingthe essenseof the experience
Whimsy
Artist at work
Text andSignage
Texture
Repeating and geometircelements and patterns
Shadows
Mannequinsas people
Irony
In-cameraTechniques
This section covers stuff you can only do in-camera, as you are shooting. True, Photoshop allows to bum up the contrast to create a believable silhoette, or blur out the background to fake bokeh, but doing in in-camera is both easier and looks more convincing.
Some of the in-camera techniques are equipment-dependent. For examle, you cannot create fisheye efefct without a fisheye lens. Besides, on crop factor cameras like Canon's Revel XT and EOS 40D you can never enjoy full fish-eye effect like you can on a full-frame camera like 1D or 5D. Similarly, you cannot achieve telephoto compression effect without a telephoto lens (duh!). But I decided to keep these topics under in-camera techniques and not create an equipment specific section simply because I did not have enough material (aside form the two examples above) to fill such section out. With contribution from more knowledgeable group members, we can develop one.
Also, some in-camera techniques border on composition techniques, but they had to go somewhere. The main distinction to me is that a composition can still be tweaked in post (although it is always preferable to compose in-camera).
Lens-dependenttechniques
Telephotocompression
Shooting at longer focal distances tends to "compress" objects in the frame, bringing background closer to the foreground. This can create quite a dramatic effect or a visual fake. Did you see the Olympic walkers in the head-on shot where the leader was a minute ahead of the chase pack, yet it looked as if they were on her heels? Telephoto compression.
A related technique is popular in portrait photography, although the focal distance is usually picked between 80 and 100mm (not quite telephoto). This allows the photographer to a)put some distance between the camera and the subject allowing the latter to feel more at ease, and b)visually shorten the nose and deemphasize other features that the subject may consider unflattering. (Shoot a face at 200mm and it will apear squished in. Shoot it wide, and you are guaranteed to get a fun mirror-like effect, although the subject will not be laughing.)
Fisheye
Motion
Zoom Explosion
This takes practice, but the results will be rewarding. Shoot in shutter speed priority and set it a longish 1/5s or slower. At midday, even with ISO 100 or the lowest your camera will alow, you may have too much light. Use neutral density filter if you have it to stop exposure down, or fix it later in Lightroom. As you press the shutter release, quickly zoom in or zoom out. Try and try again until you get it right.
Shoot on tripod or use slow-synch flash to get your subject sharp.
Slow Sync Flash
The shutter stays open for a while, the flash goes of for at the end of the exposure, you get a nice ghost of any moving elements.
Pan and Drag(and Flash)
An even more advanced application of slow-synch flash: set the background blur by panning with the subject.
Stopped Motion
Blurred Motion
Bokeh
Referring to the out-of-focus portions of a shallow depth-of-field (DOF) photo as bokeh is a surefire way to send a nervous rookie scrambling for his Wikipedia. If only he would wait to see it used for the second and third times next to a shot of a flower with just one petal in focus and the rest a blur, he would likely figure it out on his own. One thing he would not learn by osmosis, though, is how to say it correctly.
Say it like a Canadian: boke, eh? The "h" was added to the "boke" (derived from a Japanese word meaning "blur") to prevent English speakers from rhyming it with "poke". At least that's one story. The term is a fairly recent one, it has been in use since about 1996 without the "h", and since 2000 with.
DOF chart
This http://www.rags-int-inc.com/PhotoTechStuff/DoF/ is a rather technical article, which aims at demystifying the Depth-of-Field (DOF) concept and applications. It talks at length about the "circle of confusion" concept, which I had never heard of. The upshot for me was that I quickly grew bored with numbers and tables and cut to the chase - a handy diagram at the bottom of the page, illustrating how (not why) the focal length, distance to the object, aperture and image format all affect DOF.
Want a simple recipe for getting a winning shot with plenty of bokeh? Open wide and get close.
Silhouette
Unusual Angle
Dramatic (Dutch)Angle
Described as a (largely) cinematic tactic often used to portray the psychological uneasiness or tension in the subject being filmed. A Dutch angle is achieved by tilting the camera off to the side so that the shot is composed with the horizon at an angle to the bottom of the frame.
The term "Dutch" here is, reportedly, mistranslated "Deutsch": this technique was perfected by the German filmmakers of the 40s and 50s.
Low POV
Getting down and dirty (literally; pro photographers carry gardening kneepads with them) can make for an unusual and memorable shot. Getting down low allows to show a kid's view of the world, a dog's or an ant's.
Tilt Down
Tilt Up
